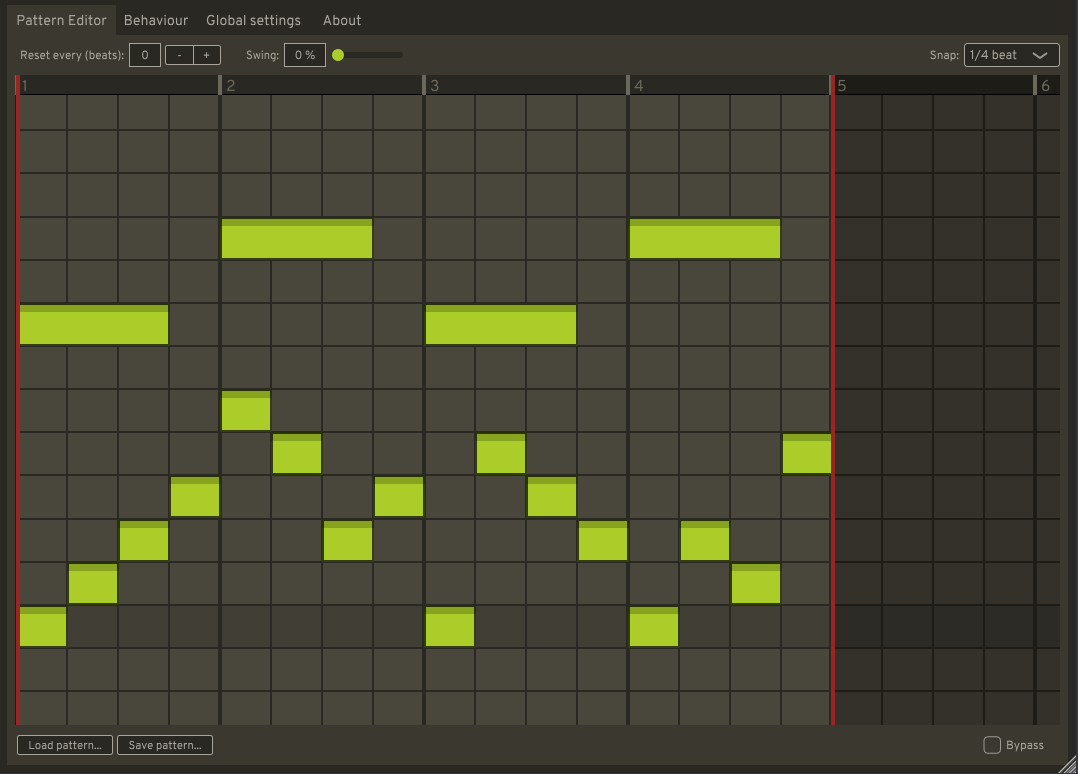
Pattern editor
The controls of the Pattern editor will be immediately familiar to the users of FL Studio, whose Piano roll is actually the inspiration for the control scheme.
The darker note line symbolizes note no. 1 (which is the lowest note of the input chord). This darker note line is only displayed if no chord has played through the particular LibreArp instance. If a chord has played, the darker note line is replaced by a green-tinted background that symbolizes the root octave - this is the octave of the original input chord. Notes placed inside of the root octave will be played in the same octave as the input chord. Notes placed outside of this root octave will be transposed by default.
The Reset every parameter sets the amount of beats after which the loop gets reset. If it is set to 0, the loop is never automatically reset.
The Swing parameter makes the pattern playback staggered dynamically. This can be used to give the arpeggio a more humanly feel.
The Snap parameter determines the divisor of a beat in the note grid, to which all of the editing snaps. To
momentarily disable the snapping, one can hold the Alt key (alternatively Ctrl+Shift because Alt is not picked up
on some systems).
The Bypass checkbox disables the plugin’s processing and lets the input MIDI pass through it. This is useful mainly when the host DAW does not have such a feature built in.
The editor view can be scrolled around using Wheel Up/Down on the vertical axis and Shift+Whell Up/Down on the
horizontal axis. The scroll position may be reset back to the zero position by middle-clicking anywhere on the editor.
The view can also be zoomed in/out:
- Using
Ctrl+Wheel Up/Downon the horizontal axis andCtrl+Shift+Wheel Up/Downon the vertical axis. - By hovering the beat bar (at the top, where beat numbers are indicated) and using the
Wheel Up/Downto zoom horizontally andShift+Wheel Up/Downto zoom vertically. - By hovering the note bar (on the left-hand side, where note numbers are indicated) and using the
Wheel Up/Downto zoom vertically, and usingShift+Wheel Up/Downto zoom horizontally (i.e.Shifthas the opposite effect than on the beat bar).
Creating a note
A note can be created by left-clicking in the note grid. This will create a new note underneath the cursor, with the length of the last edited note.
By left clicking and dragging, a note is created and can be immediately repositioned.
If Shift is being held when creating a note, the note’s starting point stays at the position of the click and dragging
then sets the length of the note.
Selecting notes
Multiple notes can be selected by holding down Ctrl and dragging a rectangle over the notes using the left mouse
button.
Selected notes get surrounded by a light green selection region. The borders of this region can be dragged, which stretches the region and the notes inside it.
Editing notes
A note can be repositioned by left-clicking and dragging its central part. After pressing down the left mouse
button, the note can be momentarily locked on its horizontal axis by holding down Shift and on its vertical axis by
holding down Ctrl.
The length of the note can be changed by left-clicking and dragging either its left or right edge.
If multiple notes are selected, the operation affects all of the selected notes.
A selection of notes can also be moved up or down by a note using Up and Down, or by an octave using Ctrl+Up and
Ctrl+Down.
Notes can be duplicated by holding Shift then pressing down the left mouse button. This will create the same notes
as the ones selected underneath the cursor. These can then be dragged around.
The selected region may also be quickly duplicated by pressing Ctrl+B or Ctrl+Shift+B. This will duplicate the
current selection and place new notes after (without Shift) the current selection or before (with Shift) it.
Deleting notes
A single note can be deleted by right-clicking on it. This can also be done by right-clicking anywhere in the note grid and dragging over the notes to be deleted.
A selection of notes can be deleted using the Delete key.
Setting note velocity
The note velocity can be changed using Alt+Scroll Up/Down. The velocity of a note is indicated by the size of the
lighter part of the note - the bigger the lighter part, the bigger the velocity.
The velocity can be reset to its default value using Alt+Middle click.
The loop
The loop region, surrounded by two red border lines, may be resized to lengthen or shorten the loop by dragging one of the lines. The region may be moved around without changing its length by dragging the area between the red border lines inside the beat bar above the note grid.
There is no limit as to how long the pattern loop can be.
Presets
Patterns can be saved and loaded as preset files. This allows you to easily reuse patterns across your projects, migrate between DAWs, etc.
A pattern can be saved using the Save pattern… button, then loaded using the Load pattern… button.